Java Environment Setup
In the previous blog, we learned what is Java, the features of Java, etc. If you want to know more about Java then visit Introduction to Java. In this blog, we will be going through the steps required for installing JDK in Ubuntu. To run the code we need an editor wherein we can write the code and run it. The code can be run in many ways for example we can use a command prompt or integrated development environment(IDE) to run the code. Nowadays developers mostly prefer IDE for executing the code because it saves time and makes our coding easy by providing suggestions. Before going through the installation steps, let's first understand some basic concepts used in Java i.e. JDK, JRE, and JVM.
What is JDK?
JDK stands for Java Development Kit. It is a part of three core Java development components i.e. JVM, JRE, and JDK. JDK provides all resources to develop Java applications. It is the most widely used Java Software Development Kit.
What is JRE?
JRE stands for Java Runtime Environment which provides class libraries and resources required to execute bytecode on JVM.
What is JVM?
JVM stands for Java Virtual Machine. It executes bytecode on any device/operating system. JRE creates a JVM instance/abstract machine for executing bytecode created by using JDK.
In short,
- JDK - is an SDK(Software Development Kit) required to develop Java applications.
- JRE - Combination of Java libraries/classes and JVM.
- JVM - Run bytecode.
Installing the JDK
Oracle JDK for Ubuntu
Following are the steps for installing the JDK for Ubuntu:
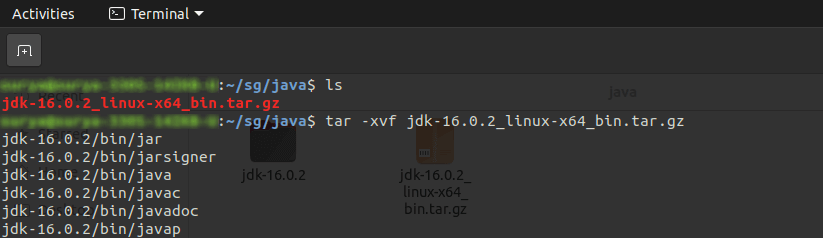
Open Oracle Java SE downloads in any browser, and select the preferable JDK version. Once the version is selected, download the *.tar.gz package of the respective JDK version for Linux. After downloading JDK, we can see the *.tar.gz in the downloads folder. Then extract the *.tar.gz, wherever we like. To extract the folder, the following command can be used:
Setting up the JDK for Ubuntu
After installing JDK, we need to add the JDK/bin directory to the executable path. To do this, we have to write one line at the end of the ~/.bashrc file. The line is as follows:
To ensure that JDK is installed correctly, open the terminal(Ctrl + Alt + T) and type the following command in the terminal,
OR
We can export it run time without adding in ~/.bashrc file, as shown in the following image:
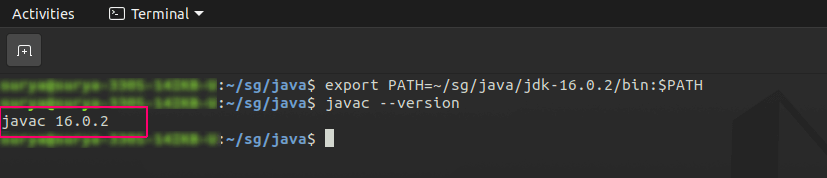
Note: Suppose the above command gives us the error as follows - javac: invalid flag: --version then we need to eliminate one hyphen(-) as follows:
The above command will tell us whether the JDK is installed or not. If the command shows the JDK version, then it depicts that the JDK is installed successfully, but if we receive the following error i.e. javac: command not found, then we will have to verify all the steps performed previously.
Installing the Open JDK Ubuntu
Open the terminal(Ctrl + Alt + T) and type the following command in the terminal. Before running the below command, we need to update the package index:
The following command will install JDK:
The following command will install JRE:
To ensure that JDK is installed correctly, run the following command in the terminal,
Compile & Run Java Program - Using the command line
Now let's see how we can create and run the program using Terminal. First, write the following program in the text editor then save it as JavaExample.java,
Now compile the program, to compile the program, the path must be the path where we have saved the code. So, in order to go to that folder, copy the path of that folder and paste it into the terminal, before pasting that path we have to add cd followed by the path.
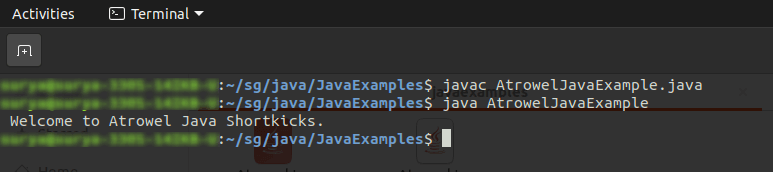
Compile the code using the following command:
If there is no error then it will be successfully compiled and will create the .class file, but if there is an error, then the error will be mentioned and we have to correct all the errors, compile it and run it. Once the code is compiled then run the code using the following command.
If there are no run-time errors then it will display the output, as shown in the following image:
Compile and run a Java program - Using the Integrated Development Environment(IDE)
Nowadays almost all developers are using IDE. The reason behind that is IDE gives ease in writing the code. In IDE we don’t have to write a whole program, it gives us the code snippet where we only have to write our code. No need to write the main method; it generates the main method automatically while creating the file. It also gives suggestions while writing code. There are several IDEs like Netbeans, Eclipse, Intellij, STS, etc. But here we will be using Eclipse IDE.
Downloading IDE
Click here to download Eclipse. When we visit that website we will see the tab Download at the right corner of the site. Click the download option, then it will give the package to download. If download for Linux, then extract the *.tar.gz, wherever we like. Windows will get the .exe file. After downloading that we will see the eclipse-inst* file. Click on it.
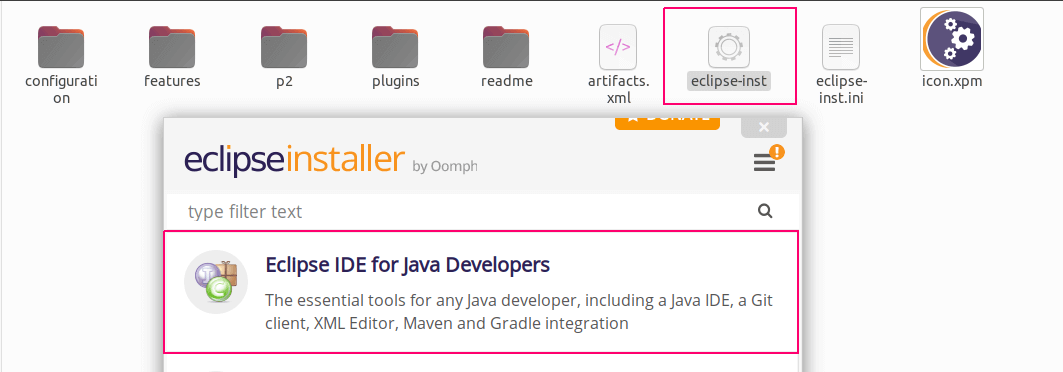
Then the eclipse installer window will be opened. Multiple options will be available. Click on the first option which says "Eclipse IDE for Java Developers". After selecting that option it will ask to install. Click on the install button. We will be able to see that eclipse has been installed successfully and now we can enjoy doing code here.
Running a Code in Eclipse
Open eclipse, a workspace window will pop up where we need to give the path where we want to create our project and give a name to that project.
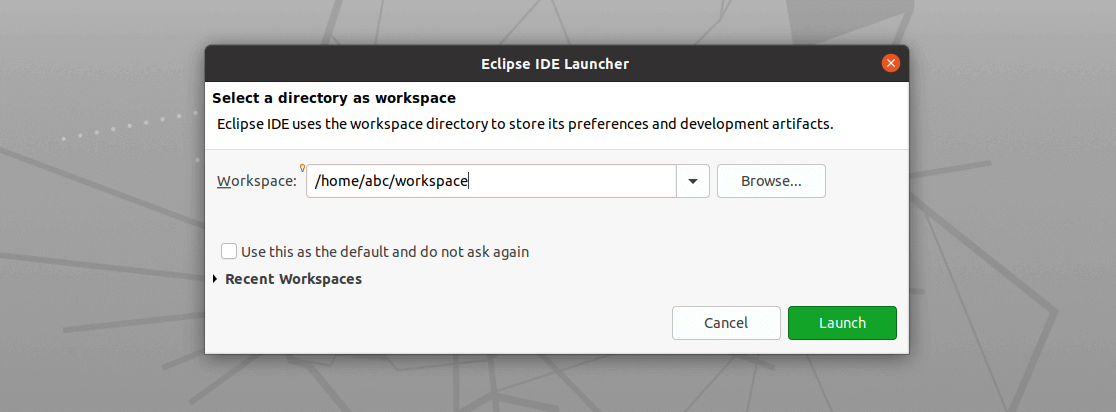
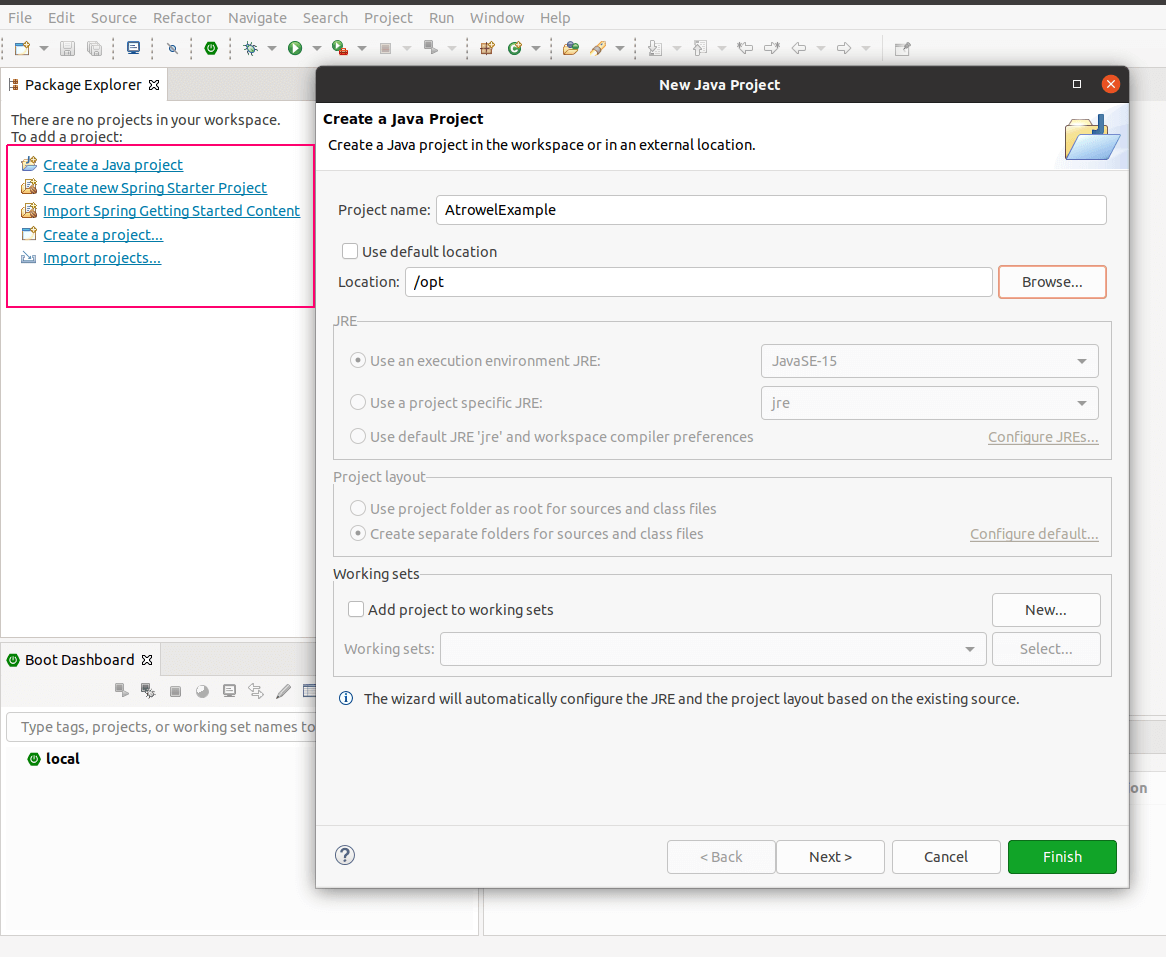
Give a name to the Project and click on launch. Once we have clicked the launch button, we will be landed in the Eclipse Welcome window. Now we write code by creating a new file or by creating a new project. For creating a new project, go to the File → New → Java Project. Then it will display a window asking for the name of the project, location, and JRE version. Give the name to the project, and select the JRE version, click on the finish button.
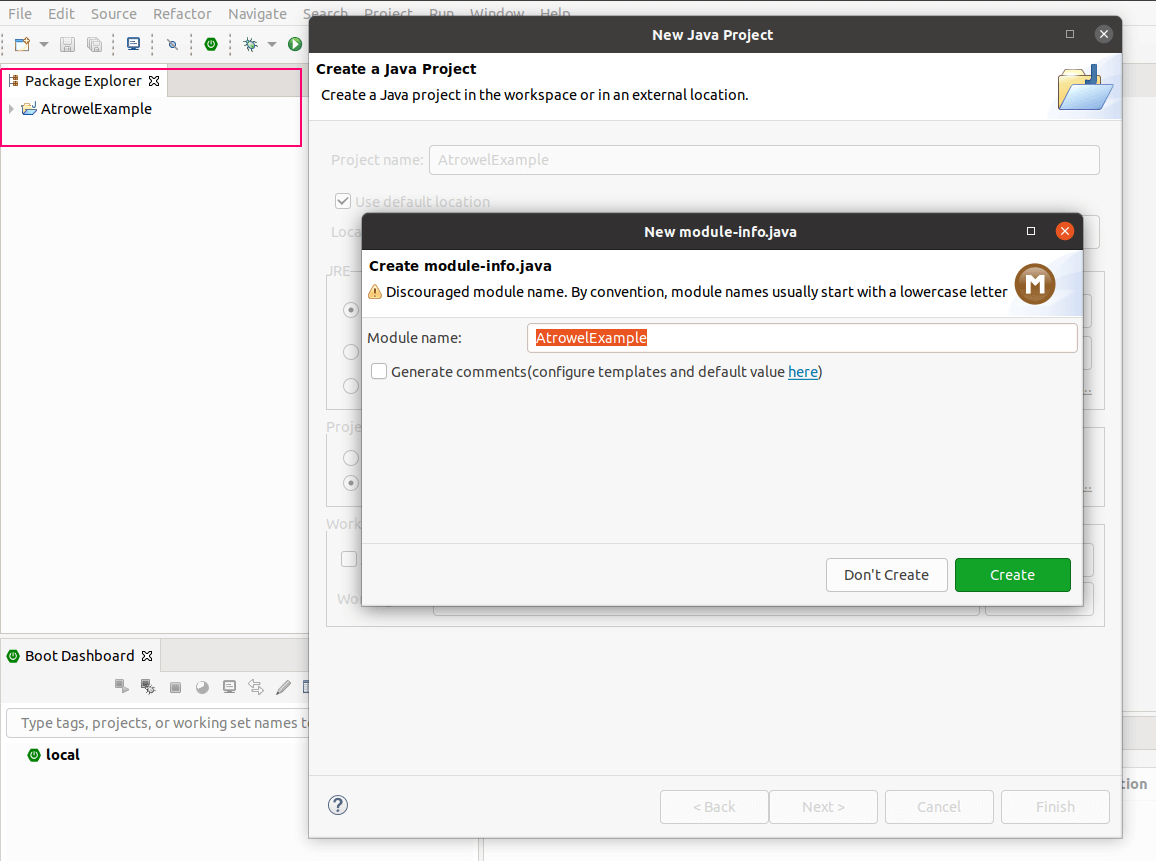
After clicking on the finish button it will display a new window create module, If you select create then it will generate a module file. You can create classes and methods.
Now our class structure will be ready where we can write the code. For running the code we only have to go to the Run tab and select Run as Java Application. Then the output will be displayed on the console which is placed at the bottom.